Monday, 10 October 2022

Farming/Non-Farming Schedule

Probably the most common question we get related to the farm is how do we do it all since we work full-time "office" jobs as well as maintain the farm. For those who see the things we post on social media, one could wonder when the work on the farm gets done when we're both working non-farm jobs during core working hours. The first point I'd say is that I'm the 6th generation Meister to work on the farm so it's been done by many families over the last 200 years and even my grandparents had off-farm jobs with my grandmother working as a teacher while my grandfather worked 100% on the farm. 

The three major reasons we can schedule two jobs are; automation, flexibility, and limited commitments. Automation is the first thing I'll talk about.


The picture above is of my firewood processor. This machine cuts back my time to making our 7 cords of firewood from 3 hours per cord to 1 hour per cord. The processor is an example of finding ways to do work in a shorter and more efficient way with less people power. We have tried to find machines or processes that shorten the time to complete our work which saves time to do other things. 

The second part is flexibility and the ability we have with our "office" jobs but also with the farm work. We are both lucky to work at companies that value the farm work we do and also our careers themselves allow us, particularly post-COVID, to work remotely.  This means we usually are up at 5 or 6AM to do morning chores (instead of commuting) then start working our office jobs around 7:30AM until lunch when we can pop out and do something like take the dogs for a walk or ted hay for 20 minutes or so. Once our work day ends at 4pm we can go right outside and start working on farm work until 9 or 9:30PM in the summers. This gives us about 5 - 6 hours a day to get farm work done, and that doesn't include weekends and vacation time. 


Limiting commitments probably sounds odd when I am talking about the commitments we have with our office work and farm tasks but it really means the evaluation we have on taking on new things. The big one is that we don't have kids, which frees up a lot of capital and time from raising children to doing things like fencing or haying. This also includes things like volunteer activities which we do a lot less then we used to do when we first moved home. It also includes limiting commitments on the farm which for us meant reducing the cattle herd from 31 at peak (calves included) that dad could raise to 12 (with calves). For my dad, it was his full-time job but for us we can't raise that many but 9-12 cattle at any given time is a perfect number for us. 


Saturday, 27 August 2022

Forest Bathing at Bar M Ranch

 We had been hearing about forest bathing for quite some time when we finally learned about a local, Nova Scotia, company offering forest bathing experiences. For Christina’s birthday (March, 2022) we finally took the chance to schedule an off-farm day involving a forest bathing wellness walk in the Watershed Nature Preserve, in Wolfville and then lunch at the Wolfville Farmer’s market. This was our first opportunity to meet Wil Bruner, a certified forest therapy guide, for a forest bathing experience. For those of you who’ve never heard about forest bathing, there’s lot of info online, but here’s a short explanation from Soft Pine Wellness’ website (www.softpinewellness.ca).

Nature’s Cure for Stressful Times

“Forest Bathing or “Forest Therapy” was created in Japan in the early 1980’s in response to mental and physical health problems from a more urbanized population. Inspired by Japan’s spiritual and cultural connection to the natural world, scientists began studying nature’s effects on human health. Now Japanese people regularly practice forest bathing within their healthcare system to maintain good health and wellbeing.

A forest bathing walk is like a walking meditation that focuses on the felt senses and each person’s unique perspective. Once the walk begins, you will be offered a series of “invitations”, sensory experiences that helps you connect to the natural world. You may be invited to carefully feel plants with your fingers or listen to the rippling of water. Through the sequence of invitations, a closing activity incorporates the experience.”


Although we spend a lot of time outdoors including in the forest here on the farm, the guided walk provided a new and different perspective of the nature that surrounds us. Even on a cold winter day, after our 2-hour experience, we felt very relaxed and satisfied with the experience that stayed with us for quite some time.


Soon after our walk with Wil in Wolfville, we coordinated the first forest bathing experience here on the farm. Our pavilion is the meeting/starting point for any of our on-farm events. The participants then walked a farm road through a series of hayfields to a path we carved through the woods and around a small pond. The path leads back up onto an existing woods road which continues to a resting spot that we created in an opening in the forest. We constructed rustic benches and stumps in the opening such that people could sit, rest, and participate in the final invitation before walking back to the pavilion. The sights and sounds will vary by season, even when using the same route. Now that the hayfields are cut and the temperatures are cooling, we’re planning a second forest bathing session here on the farm.


Thursday, 18 August 2022

Calf in August!

 Well farming is nothing short of surprises in a normal season but this year we've had a few, including a recent surprise with a new calf!

"Stormy" was born on August 13 in the middle of a rain storm to a young heifer we didn't know was pregnant. Typically our cattle are let in with the bull in late May, early June and that's when they get bred to have a calf in March or April of the following year. This cow was in with the bull for 2 weeks in November of last year and was bred at that time. 

We wouldn't have even known it was born until Christina noticed it walking around while she was drinking her morning coffee. She alerted me with a quick "What's that?!" and we both looked out the large picture window in the house to see a fresh calf taking it's first steps. Since it was a new mother, she wasn't 100% sure what to do, so we have to keep getting the calf back to it's mother and also bottle feeding it for a few days until it figured out how to get milk from it's mother. We're happy to report that both the mother and calf are healthy and the calf doesn't need help from us. That said, it was a stressful few days making sure the calf stayed alive and well with a new mother that wasn't sure what to do with a new calf. This meant we (but mostly Christina) was in the field most of the day watching where the calf went or looking for it if the mother left her somewhere. 


Since posting about this on social media, we've had some questions I'll try and answer in this blog. The biggest question we get was how did we not notice!? Well, the simple answer is she hid it well with no sign of her udder being swollen and her weight not looking much different than the other cows her age. This year, like last, we have an abundance of hay and pasture feed for the animals so none of the cattle look small by any means. This means, even though we see the cattle every day, we didn't notice much of a difference between her size and the other cattle of the same age. 

So since she was born out of cycle, what will we do with her come wintertime? Normally we ween the cattle of the mothers milk after 8 months or so but since she can't be weened off until March of next year, she'll have to stay with her mother during the winter. 

After losing a calf earlier this year, this surprise, although stressful at first, is a nice addition to the farm this summer. 

Monday, 25 April 2022

Bar M Ranch Pavilion

Although we’ve tossed around the idea of choosing a catchy name for our “event building”, we most commonly call it “The Pavilion”. When we started out, we did not even know what a building with a roof and no walls was called, but the architectural drawings called it a pavilion and it’s kind of stuck.


In 2018, we oversaw the completion of this project with the intent of hosting on-farm events to diversify farm revenue. It began with cleaning up truckloads of debris and clearing dense ingrown bushes from the (relatively) flat area across the road from the barn, and behind the existing “shop”. We had the area cleared and ditched, building permit obtained, a concrete pad placed and then erected the post and beam structure (in one weekend) that was crafted off-site. It was up in time for our Open Farm Day event that year, with the metal roof added shortly after. Although the metal roof-covered part of the structure is the pavilion, it also has a pergola to one side.

After the planning and construction project taking most of 2018, we hosted a handful of trial-run events in 2019. We quickly learned that there’s a lot to know about event planning and set to work improving our plans. Then the pandemic hit derailing our event hosting plans for 2020 (and again in 2021). During the pandemic, we were able to use The Pavilion for a contact-free pick-up location for farm sales and a few very small-scale, socially distanced gatherings. We spent this time building a website where we can pre-sell tickets/registration to events. Christina has been working on flower and herb gardens surrounding the space, and eventually we would like to include a proper fire pit area.

Now, with pandemic restrictions lifted, we’re planning a summer full of events here on the farm. Some of the events will be held directly under the building (like the herb planting workshop at the end of May and dahlia bouquet making events in September) while for other events, it provides a meeting point and space for people to linger, eat their lunch, sit back and relax, seek shelter from the sun and/or rain etc.


Saturday, 26 March 2022

Calving Season!

Well, it's that time of year again! Calves are being born on the farm with the first one being born on March 12th and it's the surest sign of spring around here. I gave Christina a cow for our anniversary a few years ago and hers was the first one to have a nice little heifer which was a relief since she is the best mother we have in the herd right now. 


There is a certain level of stress that comes with this time of year as well. We are always worried about the cows and hope that everything goes as nature intended, and no issues. Like people, they can sometimes have complications like the calf can come backward which means they will need help getting it out. Sometimes the calf doesn't have the initial instinct to start going for milk from the mother or the mother doesn't want the calf to take milk for some reason. All reasons to worry until they are all born and healthy.

This birth was textbook in that the calf came out perfect, started walking right away, and went for the milk shortly after. The mother was very protective and didn't want me near them much but she had lots of milk and the calf has been getting lots since yesterday. 

Calving season on the farm is also not as busy as years since we only have 5 cows to possibly give birth compared to 15 only a few years ago. This has been a welcome change, since we can spend more time and energy supporting a few calves 

Now that she is born, we can enjoy the moment and the turning point from winter to spring on the farm and look forward to more seasonal signs of spring. 


Saturday, 26 February 2022

Seed Starting

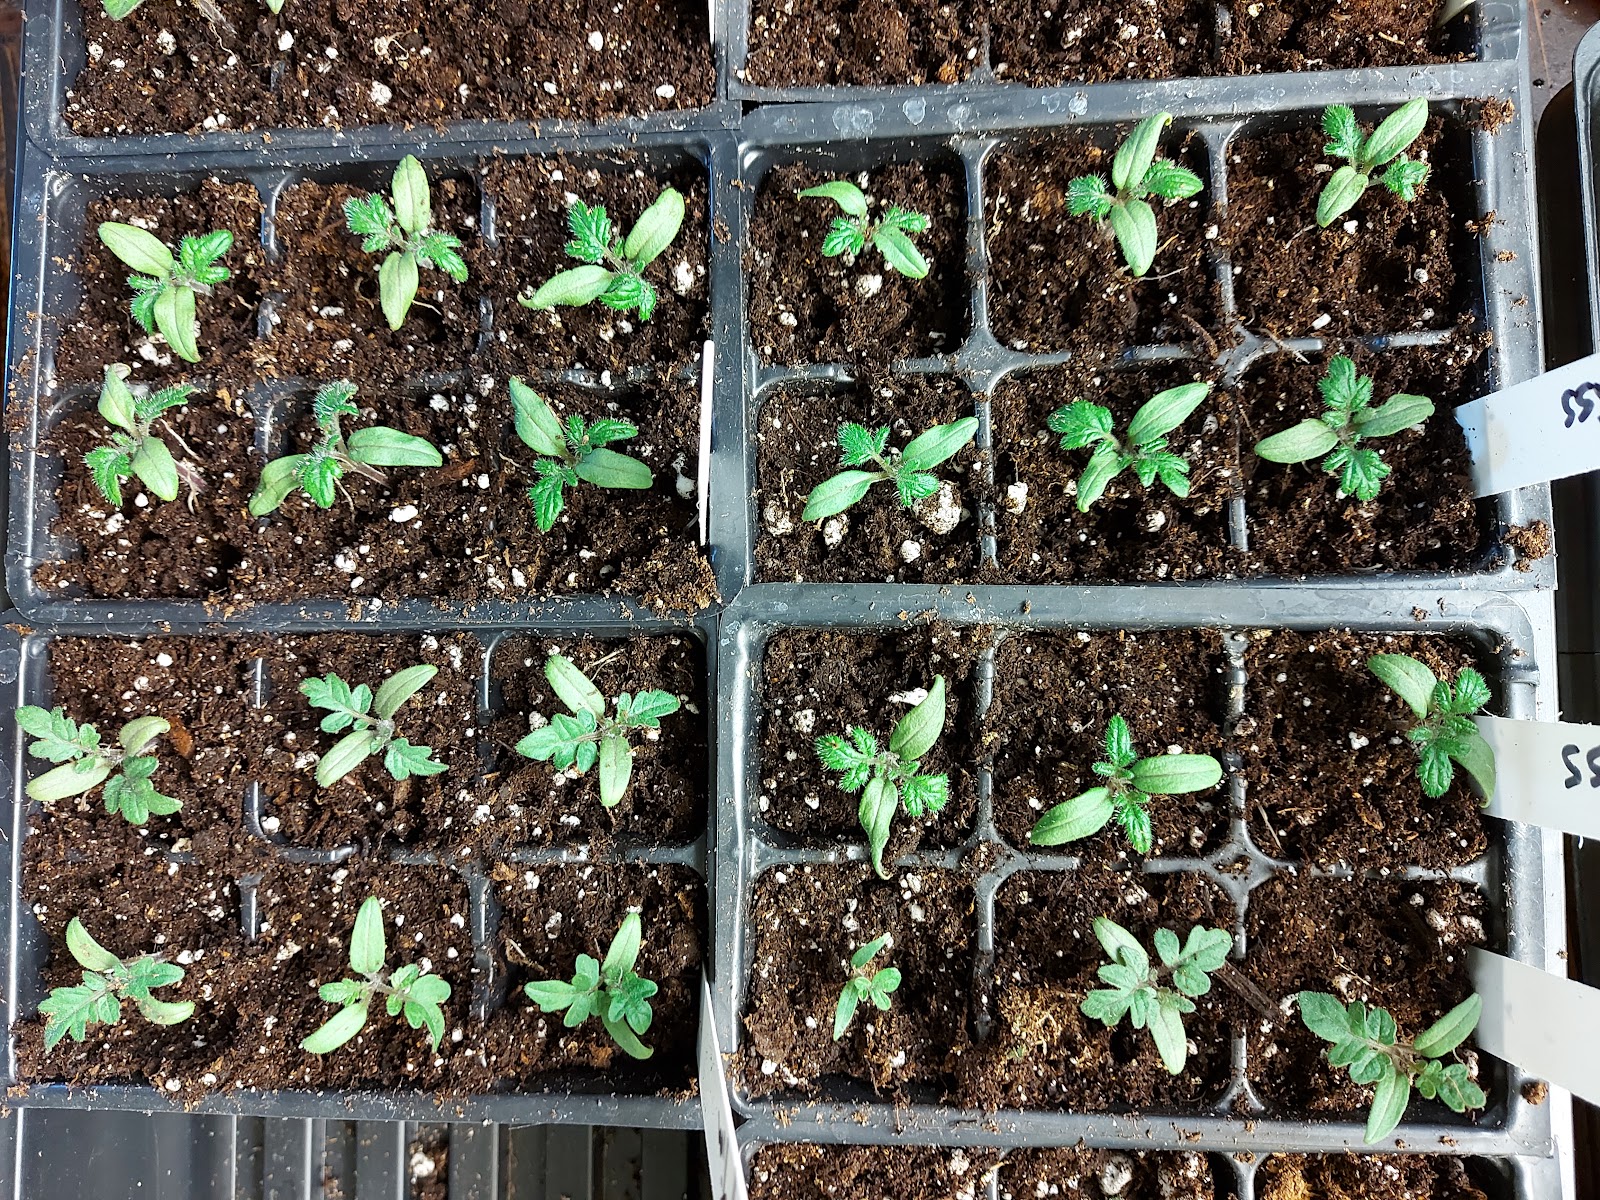
It will soon be “that” time of year. Seed catalogues and seed orders are arriving in the mail, seed displays are being set up in stores and as the days turn longer, gardeners get the itch to start planting some seeds. If you’re like me (Christina), I spend the winter pouring over glossy seed catalogue pages, placing online orders, and picking up packets of seeds wherever I find them and start getting eager to get growing. A lot of first time or new gardeners make the mistake of starting seeds too early and/or not having enough light and end up with disappointing, leggy seedlings that don’t take well to the transition outdoors. Here, in our climate (zone 5B hardiness zone according to the back of our Vesey’s seed catalogue) the familiarly recommended “6-8 weeks before the last frost” time of year is not until the beginning of April. It’s easy to make the opposite mistake and start seeds too late for slow growing things that take forever to mature.

I’ve been experimenting and reading and researching and improving my seed starting process for 10 years now. There are far too many details, to include them all in a blog post, but here are some details of the process I follow for starting my seedlings here in New Ross, NS.

Timing

Once you plant the first seeds, there are no days off until after they’re planted out in the garden so don’t start them too early! The first seeds I start every year are lavender and lemon grass, then rosemary, leeks and onions. I start those in February. They are really slow growing and need the time. Then in mid March I start peppers and early April I start tomatoes. The final seeds I start each year (May) are melons/luffa, basil and some flowers. Most seed packets indicate how many days it takes to germinate and how many days prior to the last frost you should start inside. I use June 1 to count the weeks backwards to when I will start seeds. Some plant (lettuce, onions, poppies, calendula, cabbage etc) are a lot more cold hardy and can test the limits of the last frost if you plant them outside early. The heat-loving crops (tomatoes, peppers, eggplants, luffa, cucumbers etc) will not handle cold temperatures well and only suffer if you plant them outside too early.

The lights/Shelf

My indoor seed starting set-up is pretty simple. In our main floor office, I have a heavy-duty shelf with 8 florescent shop light fixtures (each with 2 bulbs). I use a fan to blow on the seedlings to ensure they grow strong stems and can hold up to the wind when they go outdoors.  

On each shelf, I can fit four “flats” of seedlings. The light fixtures hang from chains and s-hooks so I can lift them up as the plants grow. I have a couple heat mats which speeds up germination, but those aren’t necessary, and I typically only use them for a couple weeks until the seeds have germinated. I adjust the lights so that they’re no more than 15 cm above the top of the plants. There are expensive fluorescent bulbs for plants, but I just use a mixture of the warm and cool ones so I end up with full spectrum light.


The containers

Over the years, I’ve invested in some heavy plastic trays and reuse the various sizes of plastic cells that fit inside of them for as many years as I can. I have a half dozen clear plastic humidity domes that fit on the trays. They’re only needed for a couple weeks until all of the seeds germinate. Each year I disinfect and scrub the plastic containers and use them again. I usually avoid peat pots (other than for some special cases like starting a few squashes, luffa or cucamelons that I like to start inside for just a couple to few weeks) as I find they deteriorate and get mouldy.

The soil

I buy a large bale of Pro-Mix seed starting mix from a local farm supply store. It’s quite a bit cheaper than buying multiple smaller bags. There are lots of people who mix their own, and people avoiding peat altogether, but this works for me and I’ll stick with it. The best tip I have for working with the seed starting soil is to pre-moisten it. Usually, it gets quite dry and if you put your seeds in dry soil and then water, it take a lot of water to get it moist again and sometimes moves the seeds around in the cell. I put the soil in a bucket or tote and saturate it with tap water before filling the containers.      


The seeds

I buy, swap and save seeds. I store them in plastic shoeboxes in a cooler closet in our porch and try to label each packet with the year that I’ve bought them so I can keep track of how old they are. Some seeds have longer shelf life than others, but most seeds are viable for a few years if you store them properly. I prefer to support small scale local seed savers (Incredible Seed Company, Yonder Hill Farm, Annapolis Seed, Cochrane Family Farm to name a few) and have always had great success with those seeds.

Fertilizer

Seed starting soil typically has a small amount of fertilizer in it. The seed starting soil is sufficient if you’re only growing seedlings for a few weeks before planting them outside, but they will start to turn yellow and get stunted if they don’t receive some nutrients. When, what and how to feed your seedlings is a controversial topic amongst gardeners with all kinds of varying advise. I sparingly use a liquid fertilizer.

Potting up

I tend to start my seeds in an open container (no individual cells) and then as they germinate and grow, I “pot them up” into small cells and then larger cells and then individual pots if need be. I try to keep ahead of them becoming root bound in whatever size container they’re in. I do this to save space under my lights indoors and avoid empty cells from seeds that didn’t germinate. 


Hardening Off

The final step before planting the seedlings outdoors in the garden is hardening them off. When it gets close to time to plant out the seedlings, I spend a couple weeks hardening off my plants. That involves moving them outdoors after the sun comes up, in a sheltered location (no direct sun/strong wind right away) for a couple hours at first, and gradually increasing the amount of time and their exposure to sun and wind. I move some of mine to the unheated greenhouse in May. Even after being in the unheated greenhouse, they still need hardening off before going into the garden. If you rush this process and put your seedlings out for too long, when it’s too hot or too windy or too cold, they’ll burn or break or wither.


Starting your own seeds can be a lengthy but fun and rewarding process. 


Sunday, 13 February 2022

Buying Dry Firewood

Since firewood is one of the main products for sale here on the farm, I wanted to share some information on buying and drying firewood. I get calls all the time for firewood but I don't sell all year around because I can't sell dry firewood in the late fall and winter months. A few recent calls made me think of a few tips and tricks for anyone buying firewood from any local producers. 


  • Confirm the measurement matches what you get. A cord of wood is 128 stacked cubic feet and usually, a load is measured in cords. I sell a minimum of 1 cord but most producers have a minimum of 2.  
  • Not all producers can do this but ask for a moisture reading if they have a meter. If not, you can pick one up fairly cheap at Canadian tire. Most wood is around 30-40% moisture content when delivered but it should be 10-15% moisture content when burned. 
  • Stack and cover your wood when you get it, and ideally in a place where there is good air circulation. If it's outside, in an area with a nice breeze will dry it out perfectly!
  • Ask for a receipt and confirm they have a GST/HST number if you want to apply for any provincial heating rebates.
  • Confirm the minimum order and what the delivery cost is. An example is my trailer can only hold one cord, so I charge per delivery. This means if you get 1 or 2 cords, I'm a good producer for you but if you want 4 or 5 cords I will recommend someone else since it might be more expensive to order from me. 
Check out the Department of Natural Resources site for more great information on ordering firewood! https://novascotia.ca/natr/woodlot/firewood.asp 

Rex - The life of a bull

Growing up on a cattle farm, we saw lots of bulls come and go. Their job was to breed the cattle, and the calves born would be sold as other...