Saturday, 26 February 2022

Seed Starting

It will soon be “that” time of year. Seed catalogues and seed orders are arriving in the mail, seed displays are being set up in stores and as the days turn longer, gardeners get the itch to start planting some seeds. If you’re like me (Christina), I spend the winter pouring over glossy seed catalogue pages, placing online orders, and picking up packets of seeds wherever I find them and start getting eager to get growing. A lot of first time or new gardeners make the mistake of starting seeds too early and/or not having enough light and end up with disappointing, leggy seedlings that don’t take well to the transition outdoors. Here, in our climate (zone 5B hardiness zone according to the back of our Vesey’s seed catalogue) the familiarly recommended “6-8 weeks before the last frost” time of year is not until the beginning of April. It’s easy to make the opposite mistake and start seeds too late for slow growing things that take forever to mature.

I’ve been experimenting and reading and researching and improving my seed starting process for 10 years now. There are far too many details, to include them all in a blog post, but here are some details of the process I follow for starting my seedlings here in New Ross, NS.

Timing

Once you plant the first seeds, there are no days off until after they’re planted out in the garden so don’t start them too early! The first seeds I start every year are lavender and lemon grass, then rosemary, leeks and onions. I start those in February. They are really slow growing and need the time. Then in mid March I start peppers and early April I start tomatoes. The final seeds I start each year (May) are melons/luffa, basil and some flowers. Most seed packets indicate how many days it takes to germinate and how many days prior to the last frost you should start inside. I use June 1 to count the weeks backwards to when I will start seeds. Some plant (lettuce, onions, poppies, calendula, cabbage etc) are a lot more cold hardy and can test the limits of the last frost if you plant them outside early. The heat-loving crops (tomatoes, peppers, eggplants, luffa, cucumbers etc) will not handle cold temperatures well and only suffer if you plant them outside too early.

The lights/Shelf

My indoor seed starting set-up is pretty simple. In our main floor office, I have a heavy-duty shelf with 8 florescent shop light fixtures (each with 2 bulbs). I use a fan to blow on the seedlings to ensure they grow strong stems and can hold up to the wind when they go outdoors.  

On each shelf, I can fit four “flats” of seedlings. The light fixtures hang from chains and s-hooks so I can lift them up as the plants grow. I have a couple heat mats which speeds up germination, but those aren’t necessary, and I typically only use them for a couple weeks until the seeds have germinated. I adjust the lights so that they’re no more than 15 cm above the top of the plants. There are expensive fluorescent bulbs for plants, but I just use a mixture of the warm and cool ones so I end up with full spectrum light.


The containers

Over the years, I’ve invested in some heavy plastic trays and reuse the various sizes of plastic cells that fit inside of them for as many years as I can. I have a half dozen clear plastic humidity domes that fit on the trays. They’re only needed for a couple weeks until all of the seeds germinate. Each year I disinfect and scrub the plastic containers and use them again. I usually avoid peat pots (other than for some special cases like starting a few squashes, luffa or cucamelons that I like to start inside for just a couple to few weeks) as I find they deteriorate and get mouldy.

The soil

I buy a large bale of Pro-Mix seed starting mix from a local farm supply store. It’s quite a bit cheaper than buying multiple smaller bags. There are lots of people who mix their own, and people avoiding peat altogether, but this works for me and I’ll stick with it. The best tip I have for working with the seed starting soil is to pre-moisten it. Usually, it gets quite dry and if you put your seeds in dry soil and then water, it take a lot of water to get it moist again and sometimes moves the seeds around in the cell. I put the soil in a bucket or tote and saturate it with tap water before filling the containers.      


The seeds

I buy, swap and save seeds. I store them in plastic shoeboxes in a cooler closet in our porch and try to label each packet with the year that I’ve bought them so I can keep track of how old they are. Some seeds have longer shelf life than others, but most seeds are viable for a few years if you store them properly. I prefer to support small scale local seed savers (Incredible Seed Company, Yonder Hill Farm, Annapolis Seed, Cochrane Family Farm to name a few) and have always had great success with those seeds.

Fertilizer

Seed starting soil typically has a small amount of fertilizer in it. The seed starting soil is sufficient if you’re only growing seedlings for a few weeks before planting them outside, but they will start to turn yellow and get stunted if they don’t receive some nutrients. When, what and how to feed your seedlings is a controversial topic amongst gardeners with all kinds of varying advise. I sparingly use a liquid fertilizer.

Potting up

I tend to start my seeds in an open container (no individual cells) and then as they germinate and grow, I “pot them up” into small cells and then larger cells and then individual pots if need be. I try to keep ahead of them becoming root bound in whatever size container they’re in. I do this to save space under my lights indoors and avoid empty cells from seeds that didn’t germinate. 
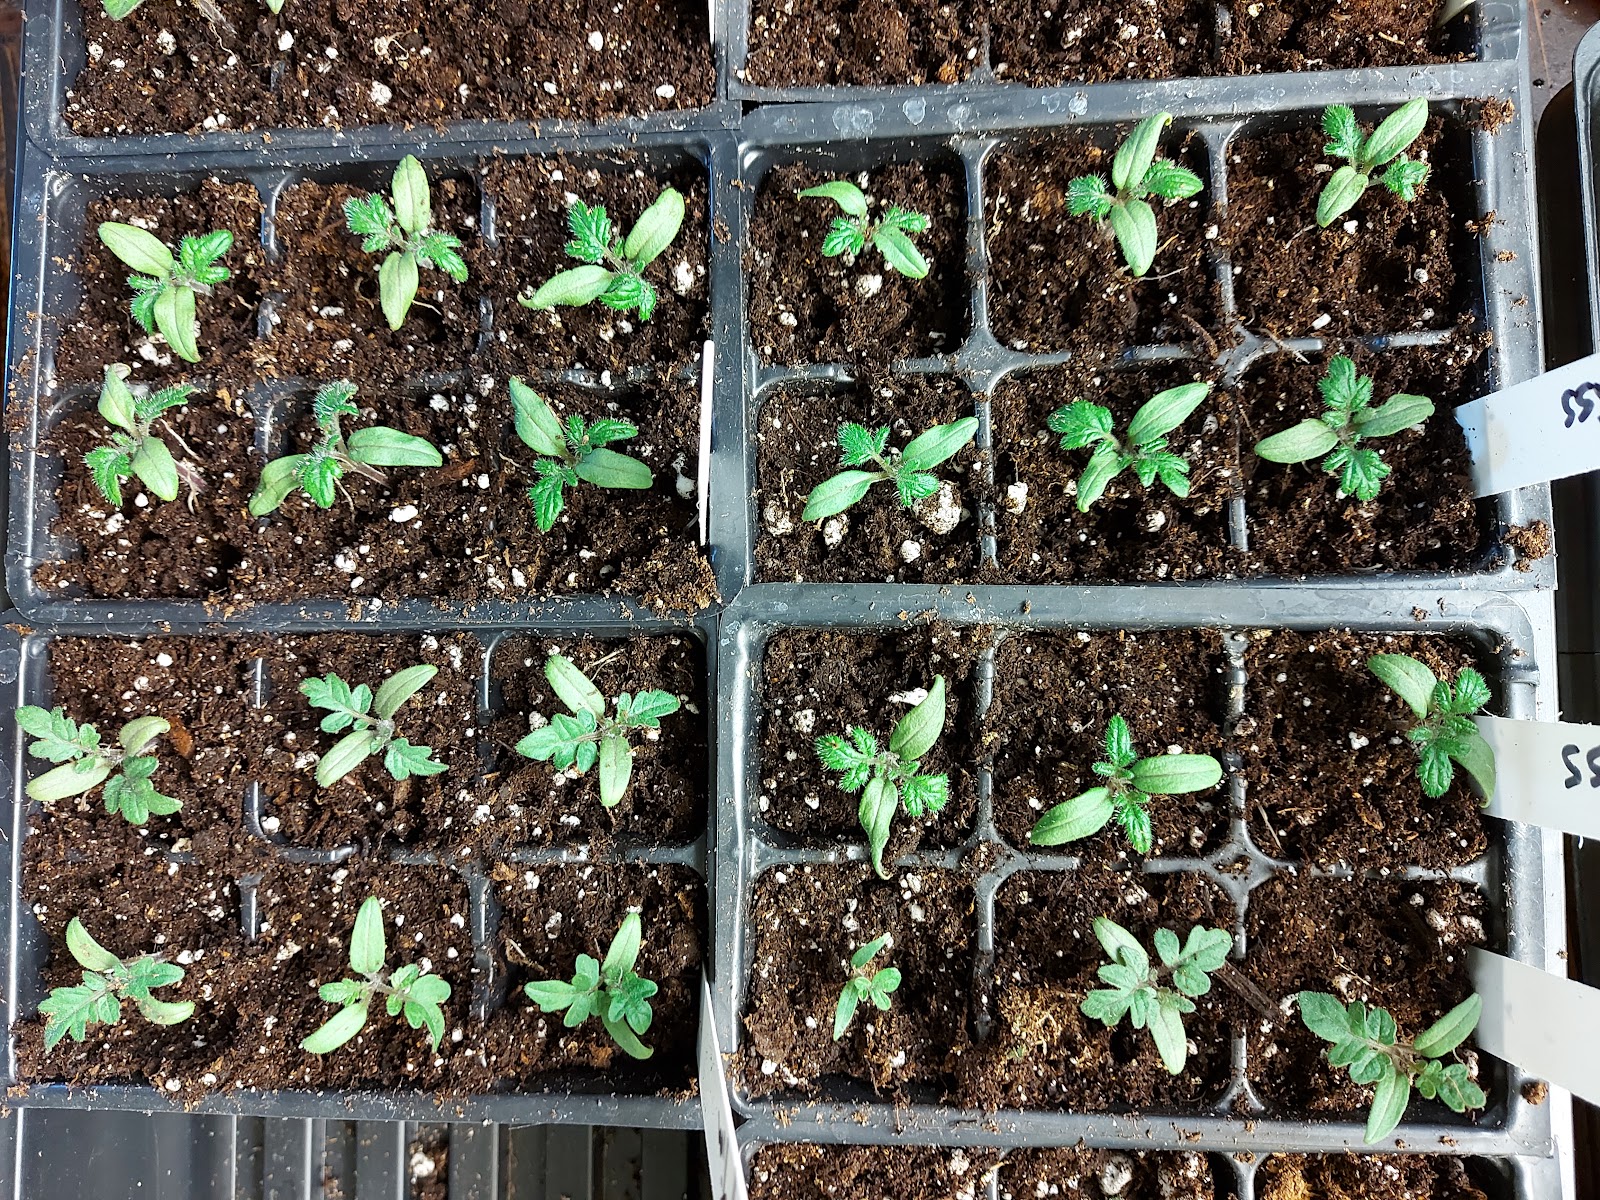


Hardening Off

The final step before planting the seedlings outdoors in the garden is hardening them off. When it gets close to time to plant out the seedlings, I spend a couple weeks hardening off my plants. That involves moving them outdoors after the sun comes up, in a sheltered location (no direct sun/strong wind right away) for a couple hours at first, and gradually increasing the amount of time and their exposure to sun and wind. I move some of mine to the unheated greenhouse in May. Even after being in the unheated greenhouse, they still need hardening off before going into the garden. If you rush this process and put your seedlings out for too long, when it’s too hot or too windy or too cold, they’ll burn or break or wither.


Starting your own seeds can be a lengthy but fun and rewarding process. 


Sunday, 13 February 2022

Buying Dry Firewood

Since firewood is one of the main products for sale here on the farm, I wanted to share some information on buying and drying firewood. I get calls all the time for firewood but I don't sell all year around because I can't sell dry firewood in the late fall and winter months. A few recent calls made me think of a few tips and tricks for anyone buying firewood from any local producers. 


  • Confirm the measurement matches what you get. A cord of wood is 128 stacked cubic feet and usually, a load is measured in cords. I sell a minimum of 1 cord but most producers have a minimum of 2.  
  • Not all producers can do this but ask for a moisture reading if they have a meter. If not, you can pick one up fairly cheap at Canadian tire. Most wood is around 30-40% moisture content when delivered but it should be 10-15% moisture content when burned. 
  • Stack and cover your wood when you get it, and ideally in a place where there is good air circulation. If it's outside, in an area with a nice breeze will dry it out perfectly!
  • Ask for a receipt and confirm they have a GST/HST number if you want to apply for any provincial heating rebates.
  • Confirm the minimum order and what the delivery cost is. An example is my trailer can only hold one cord, so I charge per delivery. This means if you get 1 or 2 cords, I'm a good producer for you but if you want 4 or 5 cords I will recommend someone else since it might be more expensive to order from me. 
Check out the Department of Natural Resources site for more great information on ordering firewood! https://novascotia.ca/natr/woodlot/firewood.asp 

Growing Luffa in NS

 Growing Luffa in NS

After two failed attempts in previous years, I finally grew about one dozen mature luffa in 2021. My previous failed attempts were direct-seeded into the garden and were just starting to blossom and produce fruit when the first frost hit or started inside too early and then struggled to take hold in the garden after transplanting and then never really did much.

On 2021, I started my seeds inside a few weeks before the last frost (roughly 4 weeks which is early May for me) and then planted them into black plastic in the garden well after the last frost day (a week or more into June when it was nice and warm). When I planted them, I mixed in a plastic pail of well-rotted cow manure. The black plastic was to keep down the weeds under the spreading vines and also attracts heat to warm the soil. The growing conditions in 2021 were good compared to the previous 2 years with frequent rains which meant I did not have to water them. The vines seemed to grow and grow and grow (warning: they take a lot of space in the garden) and I couldn’t see anything happening, and then all of a sudden, in early August, there were decent size luffa forming.


Beginning in early September, I started pruning off the ends of the vines and new blossoms so that the plants could focus on maturing the luffa that had already grown to a good size instead of the ones that were just starting to form and would never mature.


When the forecast was calling for frost, I picked them all (with a nice long stem) and put them in the unheated greenhouse. At that stage they were still “green” but they had turned from dark green to a very light green and were obviously drying inside as they were light as a feather. After a couple more weeks, as they were starting to turn brown and it was getting to freezing temperatures at night, I brought them into the house to continue drying on a shelf with a metal rack for airflow. They continued to dry and turn brown, and I could hear the seeds rattle inside if I shook them.  


Once they were totally dry and brown, I peeled off the skin and removed the seeds. I soaked them in a bucket of water with a little dish soap, rinsing them a few times and then dried them. Because I let the vines sprawl on the ground, instead of growing them on a trellis (the recommended method) some of them were “C” shaped instead of long and straight. Some had a few dark spots so I cut them into sections to avoid those bits. I left some round and cut some into flat pieces to better resemble a sponge for doing dishes or a washcloth in the shower.


I’ve saved seeds from the ones that matured first. They had nice, plump, black seeds inside and I will be growing those this year. One improvement I will make this year is to grow them up a trellis so they take less space in the garden and hang to grow straight luffas.  

Saturday, 22 January 2022

Winter time on the Farm

 Although the winter in Nova Scotia is relatively short compared to other places in Canada, winter has a huge impact on the farm. When living in Calgary, AB, we often found winter started in October and ended in late March/early April. In Nova Scotia, we often have weather that isn't extra cold or snowy until early to mid January and ends mid to late March on average. Those two or three months however, have a big impact on how the farm operates. 

The biggest impact is how the weather impacts operations and equipment. Generally, through the year there is no issue with running water to the cattle and chickens but in the winter we are always dealing with frozen water. When I had the barn renovated last year, the biggest expense was running new pipes with electric heat wrap on all the pipes so they wouldn't freeze in the dead of winter. Since we've had some nighttime temperatures this winter go down to -25 degrees celsius in some cases, the heat tape keeps 99% of the barn thawed out with the exception of the spouts on the water bowel I heat with a heat gun by hand. This is hard for all farms and no matter how well you are set up, it still creates more work.

The next impact is on equipment. I've learned over the last few years that running equipment in the winter is much less productive then in the other 3 seasons. Not only do you have to drive them in the snow and make them work hard, and burn more fuel, but you have more repairs. When equipment is running in colder temperatures, it's hard on the batteries, components that need fluid (like hydraulics), and parts of the machine that have plastic components. Because it takes such a toll on the farm equipment, I've started to park all the equipment for the winter except for the one farm tractor for clearing snow. 

A very positive impact is possibly the only good part of winter on a farm, which is the ability to rest. As any home owner knows, there is always a list of things to do but multiply that by a hundred on a farm. During the non-winter months, we are very limited to basic farm chores when the weather is poor or there is a lot of snow. This allows us to actually take weekends to rest and enjoy things like napping and reading that we never do in the other months. I often joke with my friends that the winter is the time I catch up with my Netflix shows that everyone talks about all year since I don't watch much TV when I can be doing farm work. 

Another small winter enjoyment is the use of goods that we have harvested or produced during the rest of the year. Starting in December we start to use more of the preserves and vegetables we have stored from harvests through the year. We also cook the chickens we raised and had processed in the spring as well as the beef from the previous cow we have had butchered. It's an enjoyable and rewarding part of winter to know the summer and fall harvests will sustain us through the winter.

Overall the winter presents unique aspects to farm life that we don't see in other seasons. Some we enjoy and some we don't but overall it makes us thankful to be living in this part of the world and on this wonderful farm.


Friday, 21 January 2022

Taking Apart Your Bar M Ranch Wreath

 Every year, I (Christina) hand-tie a couple hundred double-sided Christmas wreaths. I cut all of the balsam fir brush by hand from trees along the woods roads and pastures on our farm. I snip the brush into smaller pieces, assemble them in little bundles and use spools of green wire to wrap them around a metal ring. 

If you leave it assembled as-is, it has to be put in the garbage because of the metal inside of the compostable balsam fir. Please note, there are other types of wreaths that are made in different ways so their disassembly might be different. When you’re done with a wreath that I’ve made, here’s how to take it apart.

I attach any bows and cones with wire after the wreaths are complete. So, working in reverse order of how they’re made, the bows and cones should be removed first. Lay the wreath bow-side-down and find the wires that have been twisted to secure the bow and cones. Un-twist the wires and remove the decorations. Then, pry back the brush and find the green wire and metal ring. Snip the green wire (with old scissors or wire snips) and start unwinding. I find it easiest to keep unwinding and crunch the wire up into a ball as I go instead of snipping the wire into a bunch of small pieces. If you wanted to wind the wire up carefully, it could be reused for another purpose. As you unwind the wire, you’ll see all of the induvial bundles of balsam fir. All of the balsam fir can then be composted. I throw the wire in the garbage. The wire ring can be reused or recycled with scrap metal.

Every year, after Christmas, I get a couple dozen wreaths returned, and I take them apart myself and reuse the rings. I offer this “service” to anyone who buys a wreath from me. They can be dropped off at the farm anytime, no questions asked, and I’ll know what to do with them.  


Friday, 31 December 2021

2021 Tree and Wreath Season

It’s safe to say that the “tree and wreath season” of 2021 is over for us and we consider it to have been a successful one. Christmas day has passed and as we’re approaching the end of the year, we see that people are in the process of packing up their ornaments for another year. Since we don’t do the labour aspect of growing and looking after the Christmas trees on the farm (we have an arrangement with some local experts to look after our trees), tree season is relatively short for us. Tree growers look after the trees nearly year-round, but we only spend a few weeks (November and December) dealing with trees and wreaths. Some of that is administrative, marketing, sourcing labour and supplies etc with only a couple weekends of physical work in the tree lot for our annual U-Pick and roughly one month on wreath making.

After a difficult U-Pick season last year with the HRM/community travel restrictions coming into place right before our U-pick (where we instantly had to ask half of our customers to avoid travel to our little rural community), we consider ourselves fortunate of the timing of our U-Pick this year. There were relatively low case numbers of Covid-19 during the two weekends when we had our U-pick and things seemed relatively “normal”. With lots of room to social distance in the multi-acre tree lot, there was no need to wear masks and families could take their time and enjoy the annual tradition of finding the perfect Christmas tree.

New this year, we trialed tractor and wagon rides to add to the experience. As the wagon rides were slightly complicated and labour intensive (as we had to verify riders were vaccinated and masked/in the same family group) we were only able to offer a few rides during slow periods. According to the feedback we received, and the smiles on people’s faces, this was an enjoyable activity that we hope to offer more in the future. This year, we also coordinated local photographer Matthew Gates to capture some photos and videos during the U-Pick that we can use to promote future farm and U-Pick events. We’ve included a couple of his photos here in this post.


In addition to the tree U-Pick, Christina spends roughly one month each year making Christmas wreaths. She waits until after Remembrance Day to start cutting brush and spends a couple weeks of vacation time from her day job making wreaths. She cuts all of the brush by hand from the roads and fence lines around the farm. She makes a couple hundred wreaths each year making one at a time by snipping the brush into smaller pieces and attaching it to the wire wreath rings by hand. She has a number of regular customers for whom she makes wreaths for each year and supplies a hockey team fundraiser. The last wreaths of the year are sold during our Christmas Tree U-Pick. The only wreath left unsold this year was the one we hung on the front of our house.


Now that trees and wreaths are done, we move onto other tasks. Barn chores for the cows and chickens are a twice a day commitment. We tackle paperwork that we’ve put off for months and start planning for the year to come.

Sunday, 31 October 2021

Halloween Rain Day on the Farm

 It’s a rainy and windy (Halloween) day which means we’re spending the day catching up on farm work that we can do indoors. During this time of year, we have a lot of computer/paperwork, bill payments, invoicing, event planning, online content etc to do that doesn’t make the top of the priority list on nice weather days. On nice days, we are still working on garden cleanup, garlic planting (which hasn’t even been started yet), putting in our winter wood, putting things away for winter. It’s only a few weeks until the cows go into the barn and winter barn chores begin.

Christina has been harvesting seeds for months and most of it is tucked in baskets, boxes, buckets and paper bags awaiting the weekends and dark nights ahead. Today, she’s completing the final clean up step for one seed crop she’s been saving (and sharing) for a couple years now - her Autumn Beauty sunflower. She started by bagging the prettiest flower heads once they were done blooming so the birds wouldn’t eat them all. Then, she cut them and hung them in the greenhouse for a few weeks. Two weekends ago, she removed the seeds from the flower heads and put them in a bucket. The chickens found the leftovers and seed heads and have since devoured those. Yesterday, she used the wind to separate the little leftover bits from the seeds. She scoops the sunflowers a handful at a time into the air and drops them back into the bucket and the wind carries away all of the extra little bits that aren’t seed. Today, 5 months after she planted this year’s sunflower seeds, next year’s seed gets put into a glass mason jar where she’ll store them until spring.


In the spring, she plans to portion the sunflower seeds into packets and share them with people. Last year she gave away nearly 100 packets of seeds and we really enjoyed seeing people’s sunflower photos.


Rex - The life of a bull

Growing up on a cattle farm, we saw lots of bulls come and go. Their job was to breed the cattle, and the calves born would be sold as other...